Tuesday, August 19, 2014

Good Bye Sew Sweet Cottage


The winter of 2014 was incredibly hard this past year.
Most days had temps below zero and snow up to our knees, or higher.. 
I couldn't get the Sew Sweet Cottage warm enough to work in, despite all the extra insulation I added to the windows, vents and around the bottom. 

It was a hard winter for many reasons, and by Spring, we had decided it's time for us to think about moving back to Southern Michigan.. 

Because of an unexpected turn of events, we ended up doing some remodeling in our house, and in the process, added another room to my sewing space, giving me a much larger work area. 

So, my sweet little cottage was cleaned out and all the contents were moved into the house.. 

Once spring came (we weren't sure it was ever going to arrive!), I turned the Sew Sweet Cottage back into her true self... 
My husband has always worried about hauling a large trailer, so we had purchased another small, lightweight trailer we use for camping..  Because we plan on moving in the next year or so, we made the decision to sell the trailer so someone else could use her as she was intended to be used, and my husband won't have to worry about hauling her down state.. lol.. 

 Our little porch was removed..

 I renamed her "My Rolling Cottage".


Her propane tanks were put back in place...


The kitchen was transformed back into a kitchen (it had been my sewing and fabric cutting area before)
My sewing desk wasn't anything special, so we decided to go to yard sales and thrift shops, looking for something else to use.. My husband spotted this little table and chairs at a resale shop.. They were pretty rough looking and in need of a redo, but the table was the perfect size for the kitchen. 
I cleaned them up, sanded them, painted them ivory and added the stenciling, with a couple of coats of clear poly coat to seal the design.. 
The stencil design matches the stenciling on the outside of the trailer.. 
My husband also attached the table legs to the wall so the table won't move when the trailer is being towed...

The livingroom area was pretty much the same when I used it as my sewing studio, so there wasn't much to do there, other than taking down a lamp I really love, and wanted to keep for myself :o)

This area had housed shelves of fabrics when I used it as a sewing studio.. 
It was transformed back into a bedroom area.

 I always thought the little bathroom area was so cute!! 
The bathroom in our smaller trailer is teeny tiny.. Makes this one look huge. 

Tomi posed for one last picture with her...We've always thought Tomi felt the trailer was his. 


I took lots of pictures, put an ad on Craigs list, and she was sold within a week. 
Farewell Sew Sweet Cottage (AKA: My Rolling Cottage).. 
I've sure enjoyed her for the last 5 years, but know she's gone to a good home.
Enjoy her new owners!! 

Thursday, September 26, 2013

Painting the exterior of a travel trailer

I've wanted to paint the outside of our travel trailer, aka: my sewing cottage, for a couple of years now, but just couldn't find the time.. I finally just made myself find the time this summer, and she's now done.. I'm really happy with the results and was very surprised at how easy it actually was. 


I had read on a trailer blog, Mobile Home Living, that you can paint the exterior using Rustoleum spray paint.. Who knew? 

I walked into a store called Merchandise Outlet one day and noticed they had a whole bunch of spray paint for $1.69 a can... The same paint cost $3.89 at WalMart, so I was excited.. They had quite a lot of the color "celery" and "ivory", so I decided that would be the color I'd use.. I bought 6 cans of the green and 8 cans of the ivory... In the end, I had to order another can of the green (celery) from Amazon because no one else carried it and Merchandise Outlet had sold out of it... I also purchased a couple of cans of the pink from WalMart, so all in all, I spent under $50 to paint it.. 


I scrubbed the trailer really well with an Rv brush and dawn dish soap! I sprayed it off really good and let it dry.. Once it was dry, I started painting from the top down.. First, though, I taped off all the windows. It only took me one day to finish it.. It really was easy to do.. 

Once the ivory and celery colors had been sprayed on, and it was dry (dried really fast.. it was a really warm day out), I taped off the center for the pink paint.. I used Scotch brand painters tape and nothing lifted off.. I was impressed! I just followed the same lines that already had a striped design, so it was very simple to do.. 

Once the pink paint was dry, I decided it needed something more, so I looked through my stencils and found one I liked..I love roses and gingham, so the two stencils I used seemed perfect. 


I used acrylic craft paints to do the stenciling, and once it was dried, I sprayed it with Rustoleum Clear Gloss Enable Spray to protect the stenciling from the weather.. I bought that product from Walmart for $3.77 a can...

So far, so good! I haven't noticed any fading.. It's been about 6 weeks and it looks just like it did the day I finished it.. 


I decided to add a rose wreath stencil to the front door.. This stencil has a special meaning to me.. Before I met my husband, I owned an old Victorian home, that I loved.. I had decorated the front screen door with this heart stencil, so this brings back a good memory every time I look at it. 


The people that bought my Victorian home have painted it some very odd colors, but they left the screen door the way it was, so my stenciled heart is still there ;o) 

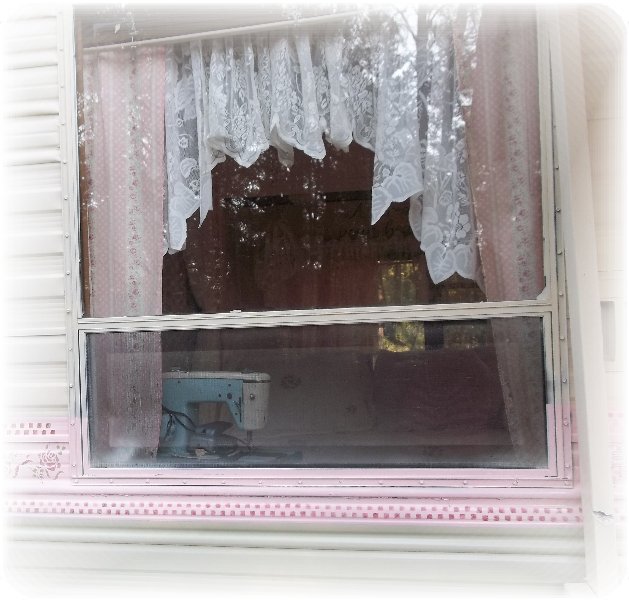
Last thing I did was paint the window cover the same way, with a stencil and acrylic paints, then sealed it with the Rustoleum Clear Finishing spray.. 


I use the Sew Sweet Cottage to sew pet tents and kozy kitties, which I sell on my website Karens Kottage... I have a sewing room inside the house, but it is so nice having an extra sewing space! I love it out there. It's so peaceful and quiet.. 

For the last several years, we've used hay bales to block air from getting under the trailer, which helps with heating it in the winter.. This year, we decided to buy pink insulation board and used that to block the air, then my husband made a little picket fence to put up against it.. We had a whole bunch of wooden rails left over from another project years ago, so that's what he used to make the little fence. I bought a can of the same ivory paint I'd used on the trailer and painted the fence with a small roller... I also painted the little porch my husband made with the ivory paint. 


Next year we'll build a longer porch, about the width of the original awning and plant flowers in front of the picket fences.. I'd love to add flower boxes under the window's, too!


I had enough paint left over to spray paint the two wire chairs that sit in front of the trailer..

I didn't mention this at the beginning of this post, but it's worth mentioning. Before I did any painting on the trailer, I scrubbed the top of it really good with the RV brush, sprayed it off really well with the hose, then after it dried, I painted the top with Cool Top roof paint by DeWitt. It's an elastomeric roof coating, which helps seal any leaks and also keeps the trailer cooler in the summer by reflecting sun rays..I used a paint roller on a long handle. I painted while standing on a ladder, so I had to keep getting down, and moving the ladder to the next section, moving the paint tray, etc...It was very hot that day, so this was not a fun project, but something I knew I should do... I'm glad it's done! 

We bought the Cool Top from Home Depot for about $18 a can.. One can did the entire roof.. I also bought some Lap Sealant by Dicor to seal all roof seams.. The trailer doesn't have any leaks, and I want to keep it that way..  I couldn't find this locally, so I ordered it from Amazon.  This is something I still need to get to before too long! Maybe this weekend??? 

I didn't keep track of exactly what we spent to paint the exterior of our travel trailer, but with the roof and everything including the insulation board and picket fence around the bottom, it was well under $100... 
Before

After

Now that My Sew Sweet Cottage is done, I've moved on to the little 1982 Sunline Travel Trailer we bought this summer.. I'm going to start painting the outside of that one today!

Monday, August 5, 2013

1982 Sunline Travel Trailer Redo

Whoa whoa... If you read my first travel trailer post, you know that I really wanted a smaller travel trailer when we first started looking for one... 


We ended up purchasing a 21' trailer that we decided not to use as a travel trailer, but rather, a sewing cottage for me.. I love it, but have still longed for a cute little travel trailer.. 


Well, this weekend we found a sweet 13' Sunline Travel Trailer and officially purchased it this morning for $700..It's 31 years old, but still in pretty good shape.. It needs a bit of work, has had a small bit of water damage, but all in all, it's a nice little trailer just begging for an updo.. 


I worked on it just a tiny little bit today, we went and bought the paint I'll be using and I hope to plunge in by this weekend... I have a lot of orders to work on right now so it's going to be a hard week wanting to be out there working.. Can't wait to get started!!


Pictures will be posted very soon....


For more pictures and descriptions, click on the link at the top of the page titled 
"Vintage Travel Trailer Redo"..


Sunday, June 2, 2013

Backyard Sewing Studio


It's been 5 years since I first renovated our travel trailer (See blog HERE).. She ended up being my backyard sewing studio rather than a travel trailer... I had decorated her in a pretty Coca Cola Theme 5 years ago, which was great when we were planning on using her for camping.. But since I've been using her for sewing for 4 years now, I've really wanted to redo her again and turn her into something really pretty and more sewing room friendly...

I've been trying to get done with her all summer but just couldn't seem to find the time.. I just finally decided I was going to donate an entire week to work on her, and she's now finally done...

I turned her into a very pretty and relaxing place to work... I'm not really sure what you'd call my style.. I love cottage chic, country decor and shabby chic, but I've never really followed trends.. I look through a lot of styles and seem to just pick out things I like and incorporate them into my own style.. I don't think I really have a specific style, but rather, a Karen style....

I started by ripping down the old wallpaper, took all the cupboard doors off to be repainted and got started... I was really surprised at how well the old wallpaper had held up... I had to really work to get some of it down.. I had planned on painting the walls, but decided last minute to use a roll of wallpaper I had purchased from Lowes a couple of years ago on clearance..

Before re-wallpapering, I painted all the wood walls and cupboards cottage white.. I also painted the cupboard doors cottage white.. Since the doors were coca cola red, I used a primer first to block the red.. It worked better than I thought and I only had to add a couple of coats of the cottage white..


I distressed each cupboard door to show a bit of the red underneath the paint.. I had removed all of the white knobs from the doors and I replaced them with some shabby pink glass knobs I had purchased from a seller on ebay.. I love these glass knobs.. 


The wallpaper I used match the glass knobs perfectly.. There's not much of a pattern to the wallpaper, but it's the perfect shade of pink, and since it's sometimes pretty tricky finding the perfect color of pink in paint, it was a great alternative..  

Not wanting to go so far as to remove the refrigerator, stove, sinks or toilet, I found ways to hide them... 

I removed the door to the fridge and planned to just use the shelves for storage, but the inside of the fridge was a kind of a golden color and it just looked icky with the pretty cream and pinks on the walls... So I decided to use modge podge and coat the inside of the fridge with crinkled tissue paper... I used white paper thinking it would mute the golden tone and it would end up looking cream... I ended up liking the kind of paper mache look, but not the color.. It just looked like white over gold and wasn't pretty.. So I waited a day until it had dried really well, then I painted it with the cottage white paint.. It turned out looking really neat! 

I don't think it would have worked very well to just paint the inside of the fridge, as I suspect the paint would have been scraped off really easily... But the paper mache affect created a perfect surface for painting.. I cut out some flowers from an old wallpaper border and modge podged them here and there.. It ended up looking like an aged cabinet and I really like it.. 

 I added a tin sign I found at Hobby Lobby's over the control panel at the bottom of the fridge to hide the knobs.... 

I covered the stove and sink with a 1" thick piece of mdf and covered that with my cutting mats to use as my cutting table...

 I had a pair of white lace curtains that weren't being used anywhere else, so I stuck them in the washer with a little bit of tan fabric dye to create an ivory color.. It worked great and once they were dry, I cut them to fit under the cutting board to hide the oven and cupboards I never use.. I have a large amount of a really unique ivory and pink lace, so I decided to trim the curtains in it... 


I've had my eye on a certain fabric on the Hobby Lobby website for quite some time, but didn't really have anywhere to use it.. I decided it would make perfect curtains for the Sew Sweet Cottage, so I ordered enough to make curtains one week when they had free shipping plus 40% off the entire piece of fabric.. 
cha ching!!!


I made curtains for all the windows and topped them with the lace valances I had already been using on the windows before the redo...
For the last 5 years, I've put plastic on the windows for the winter, but it's kind of a pain! I recently read about window quilts, so I'm going to make quilts this year for the windows that will be attached with velcro to the window sills (on the inside)... I'll be able to remove them in the spring and store them until winter... I'm crossing my fingers this will be a good option to help insulate the windows. 
A lot of cold air gets in through the doorway in
the winter, so I made a curtain for the doorway that I can keep closed in colder months.. I attached it to a thermal drape so it will really block out the cold..


I covered the red leather couch with a quilt I've had for awhile that I no longer used in the house.... 

I've had a hanging light fixture stored in the garage for quite some time with no where to use it.. It was just a plain clear glass globe and not that great looking... I wanted a light positioned near the couch so I can have a nice cozy place to read... I made a lace cover for the lamp out of left over lace from the curtains..I just sewed a simple hem in the top and laced a pink ribbon through it to tie tight around the top of the globe. It was simple to do and adds the perfect light for reading....


I had bought a mason jar lamp kit quite a long time ago but never had anywhere to use it... I have a small collection of the old green mason jars, and this  is one of the huge old jars... I bought the lampshade on clearance at dollar general for $4.. It makes a nice little lighted area in the corner near my sewing machine...
My sewing table is a desk we found set out by someone's driveway with a FREE sign on it.. Love finding stuff like that!

I use my older Singer machine out here.. I have a newer machine in my sewing room in the house, but have to say, this Singer is one reliable machine! 

Half of the floor is done in carpet and the kitchen area, which is now my sewing area, was done in a vinyl floor.. There was really nothing wrong with it other than I just didn't love the color, plus the previous owner had taken out the table that came with the trailer, which had left a large round area with no vinyl on it.. We had some peel and stick tiles we had purchased years ago for the house, but then decided not to use, so I decided to use some of them on this floor... 


What used to be the bedroom is now my fabric room... We had already removed the bed to add a cutting table before this redo... Since I moved my cutting table to the other end of the trailer, I was able to add more shelving and store a huge amount of fabric in this area of the trailer... 

I took down the folding door that came with the trailer and spray painted it ivory... It turned out looking kind of like a big gingham print.. I was going to spray it with another layer, but decided I sort of liked it the way it looked, so I left it that way... 

I can store an unbelievable amount of fabric in this room! With the doorway closed, it will stay dark in this room, which will help keep my fabrics safe from any light damage... There is a toilet, sink and shower in this room (that we've never used), but I've placed shelves so that every space available is being used to store fabric and the sink, toidy and shower are completely hidden..

There's a little cabinet under the window that has never really made much sense to me.. lol.. It's built over the wheel well, but it's really narrow so really doesn't work well for any type of storage... I decided to use it to display my 1954 Brother Sewing machine.. I was born in 1954 and my husband and I found this machine at a garage sale for $7... It still works, actually, I'd say it works better than many newer machines on the market today, but it does need a new cord, as someone had spliced it two or three times.. 

hmmmm....That reminds me, I asked John to replace that cord for me a couple of years ago. lol.. 
Guess I need to remind him.. 
I love the color of this old machine! There's just something very neat about old sewing machines..

My son in law is career military and is stationed in Germany right now along with my daughter and three grandkids... My daughter found a really old German machine for me at a garage sale and sent a picture of it to me telling me it's my Mothers Day/Birthday Present.. The only problem is, it's heavy, and will cost a small fortune to ship home, plus there's the danger of it getting damaged... When they come home, so will my vintage machine.. I can't wait to add it to this little cabinet area...
I love old machines! They were built to last and are just so neat looking!!


I've always loved this saying, and in fact, it's part of my logo on my Karens Kandles website.  
I bought this wall decal sticker on Amazon..It's vinyl lettering that you press onto your wall, and then pull the backing paper away... It took a bit of patience to get it on there, but once it was on, it's there to stay... 

What can I say? 

When I got all done with the inside, I decided to paint the outside! 
But that's a blog for another day.. It's past my bedtime and I'm getting very sleepy!!